Self Assembly Field Kit Guide
Step-by-step hardware assembly instructions for the Jetson Orin Nano Field Kit — NVMe, WiFi, CSI cameras, and case mounting.
Safety first
Power off the Jetson Orin Nano completely before assembly. Do not overtighten mounting screws. CSI ribbon connectors and latches are delicate — lift the latch gently, insert the cable squarely, then press the latch down without forcing.
Print a copy for your workbench: Download printable assembly poster (8.5″ × 11″, portrait).
What's in the Box
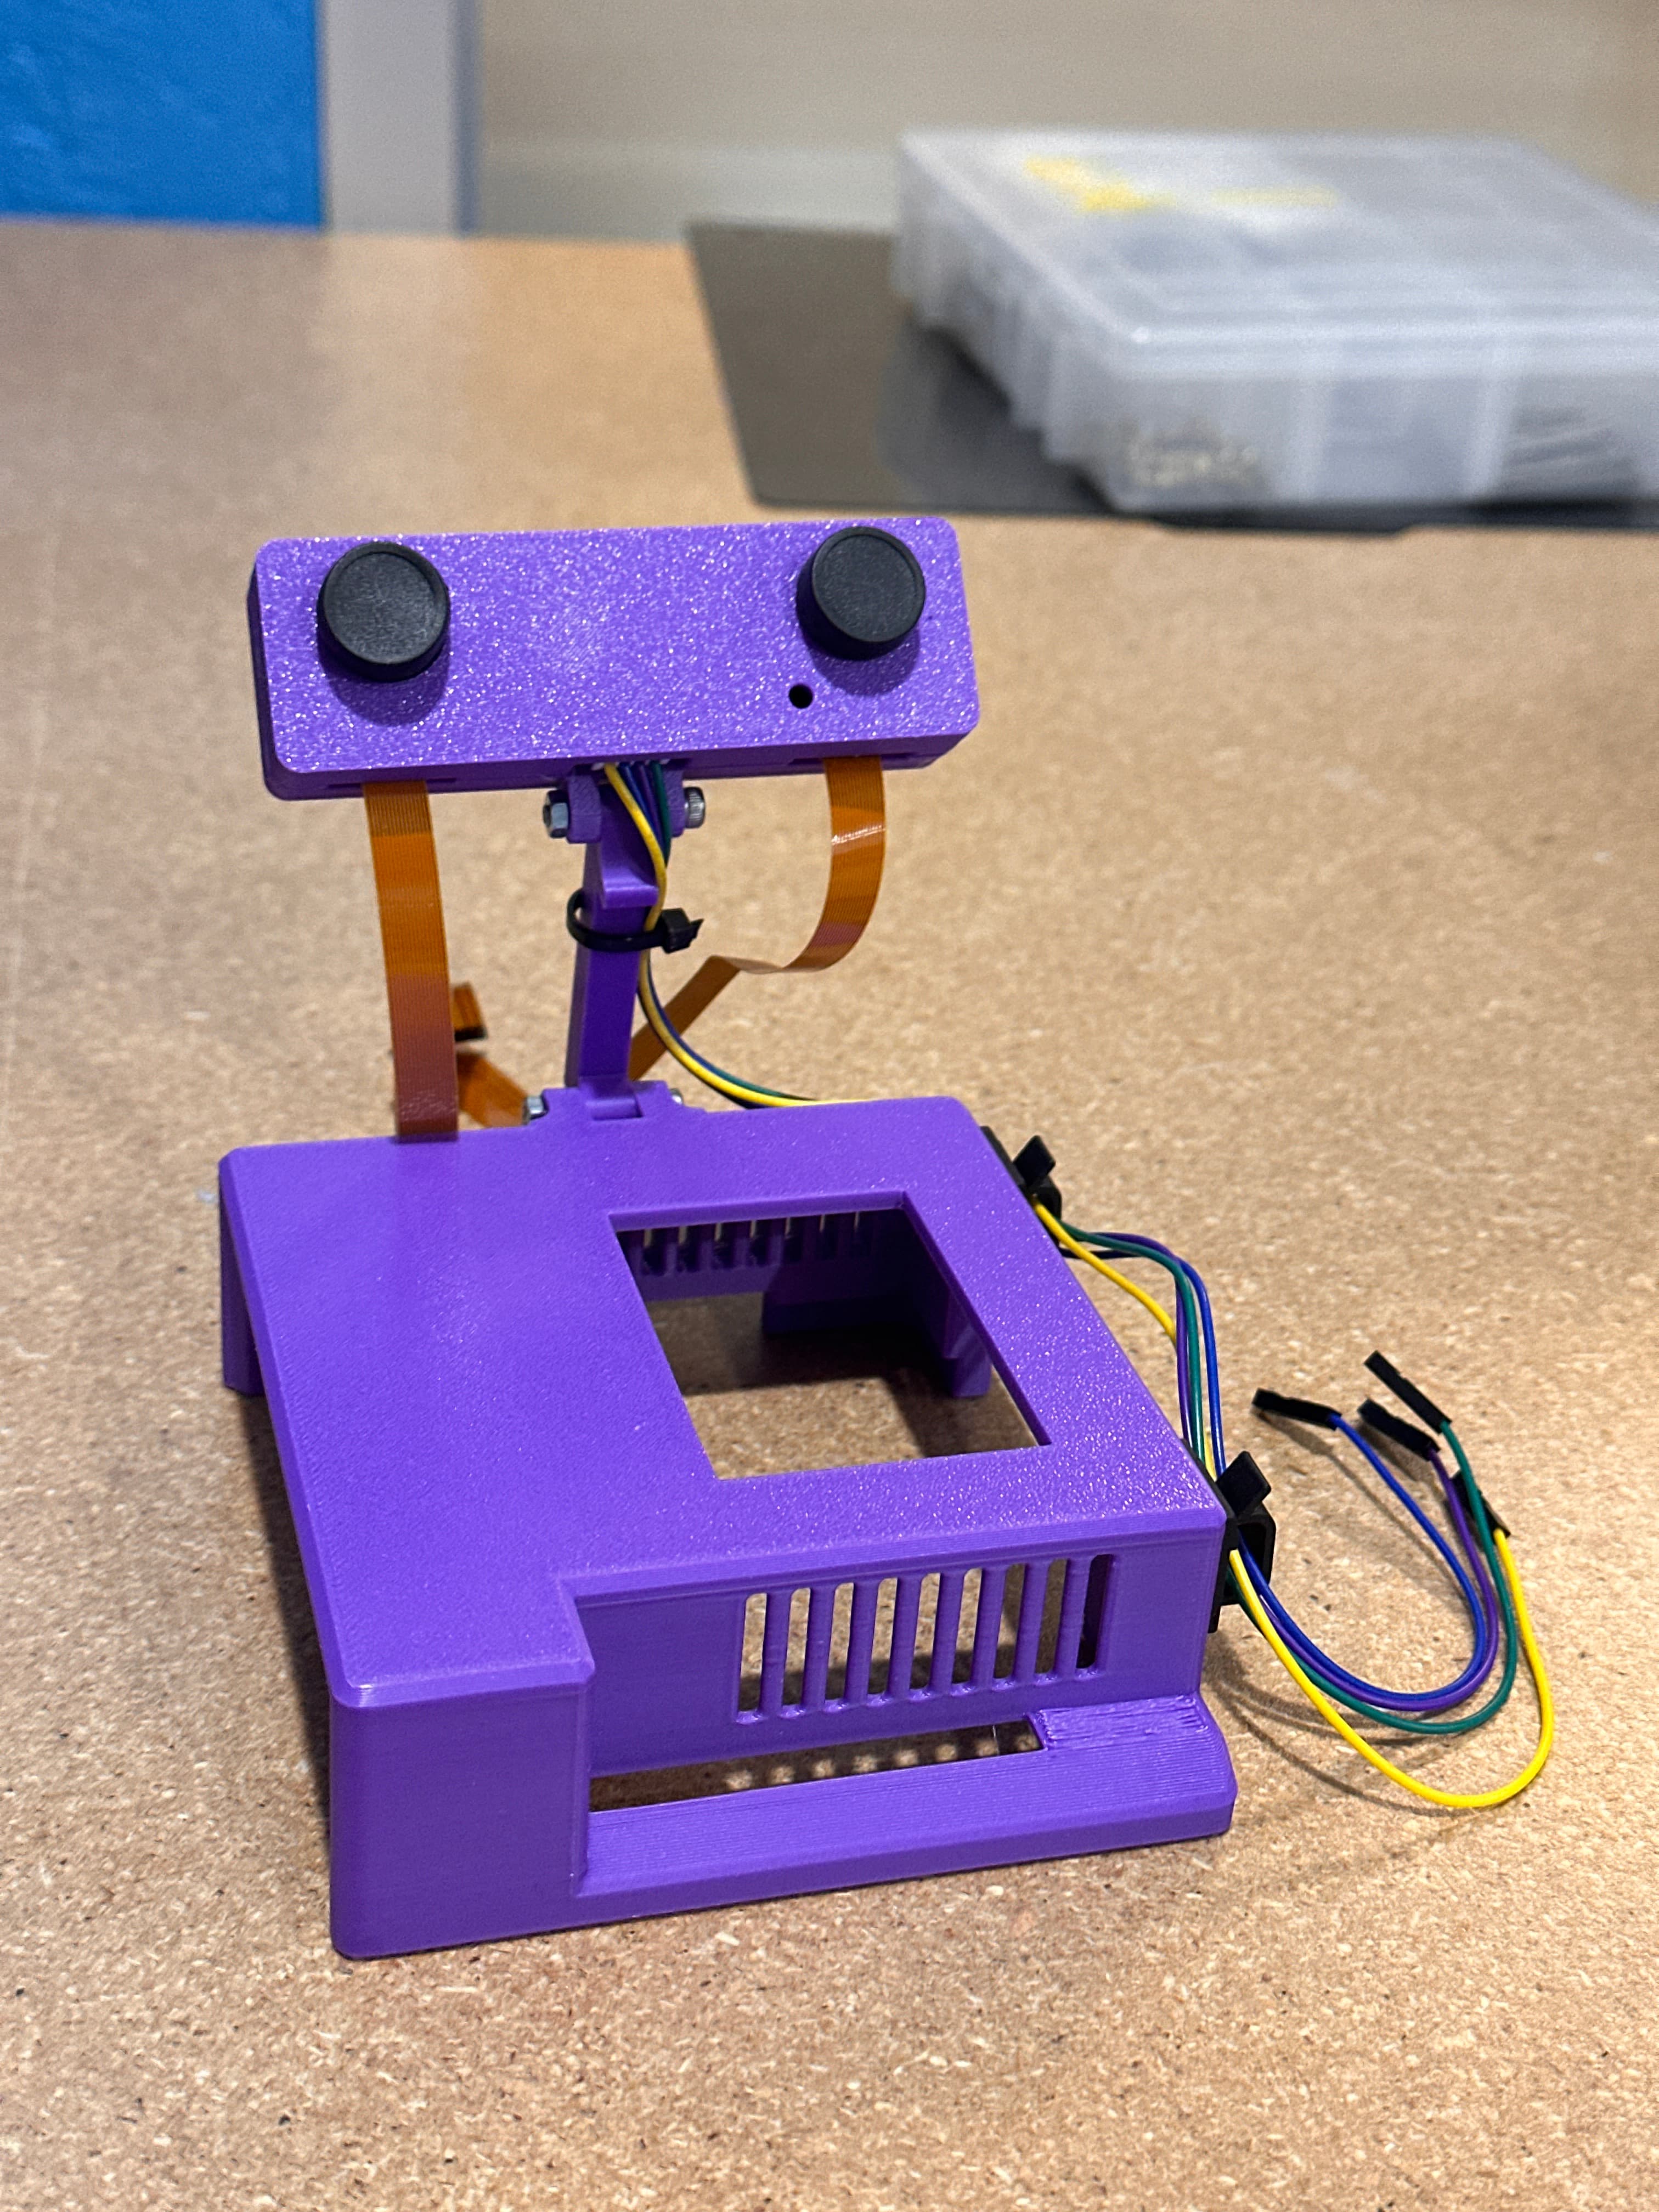
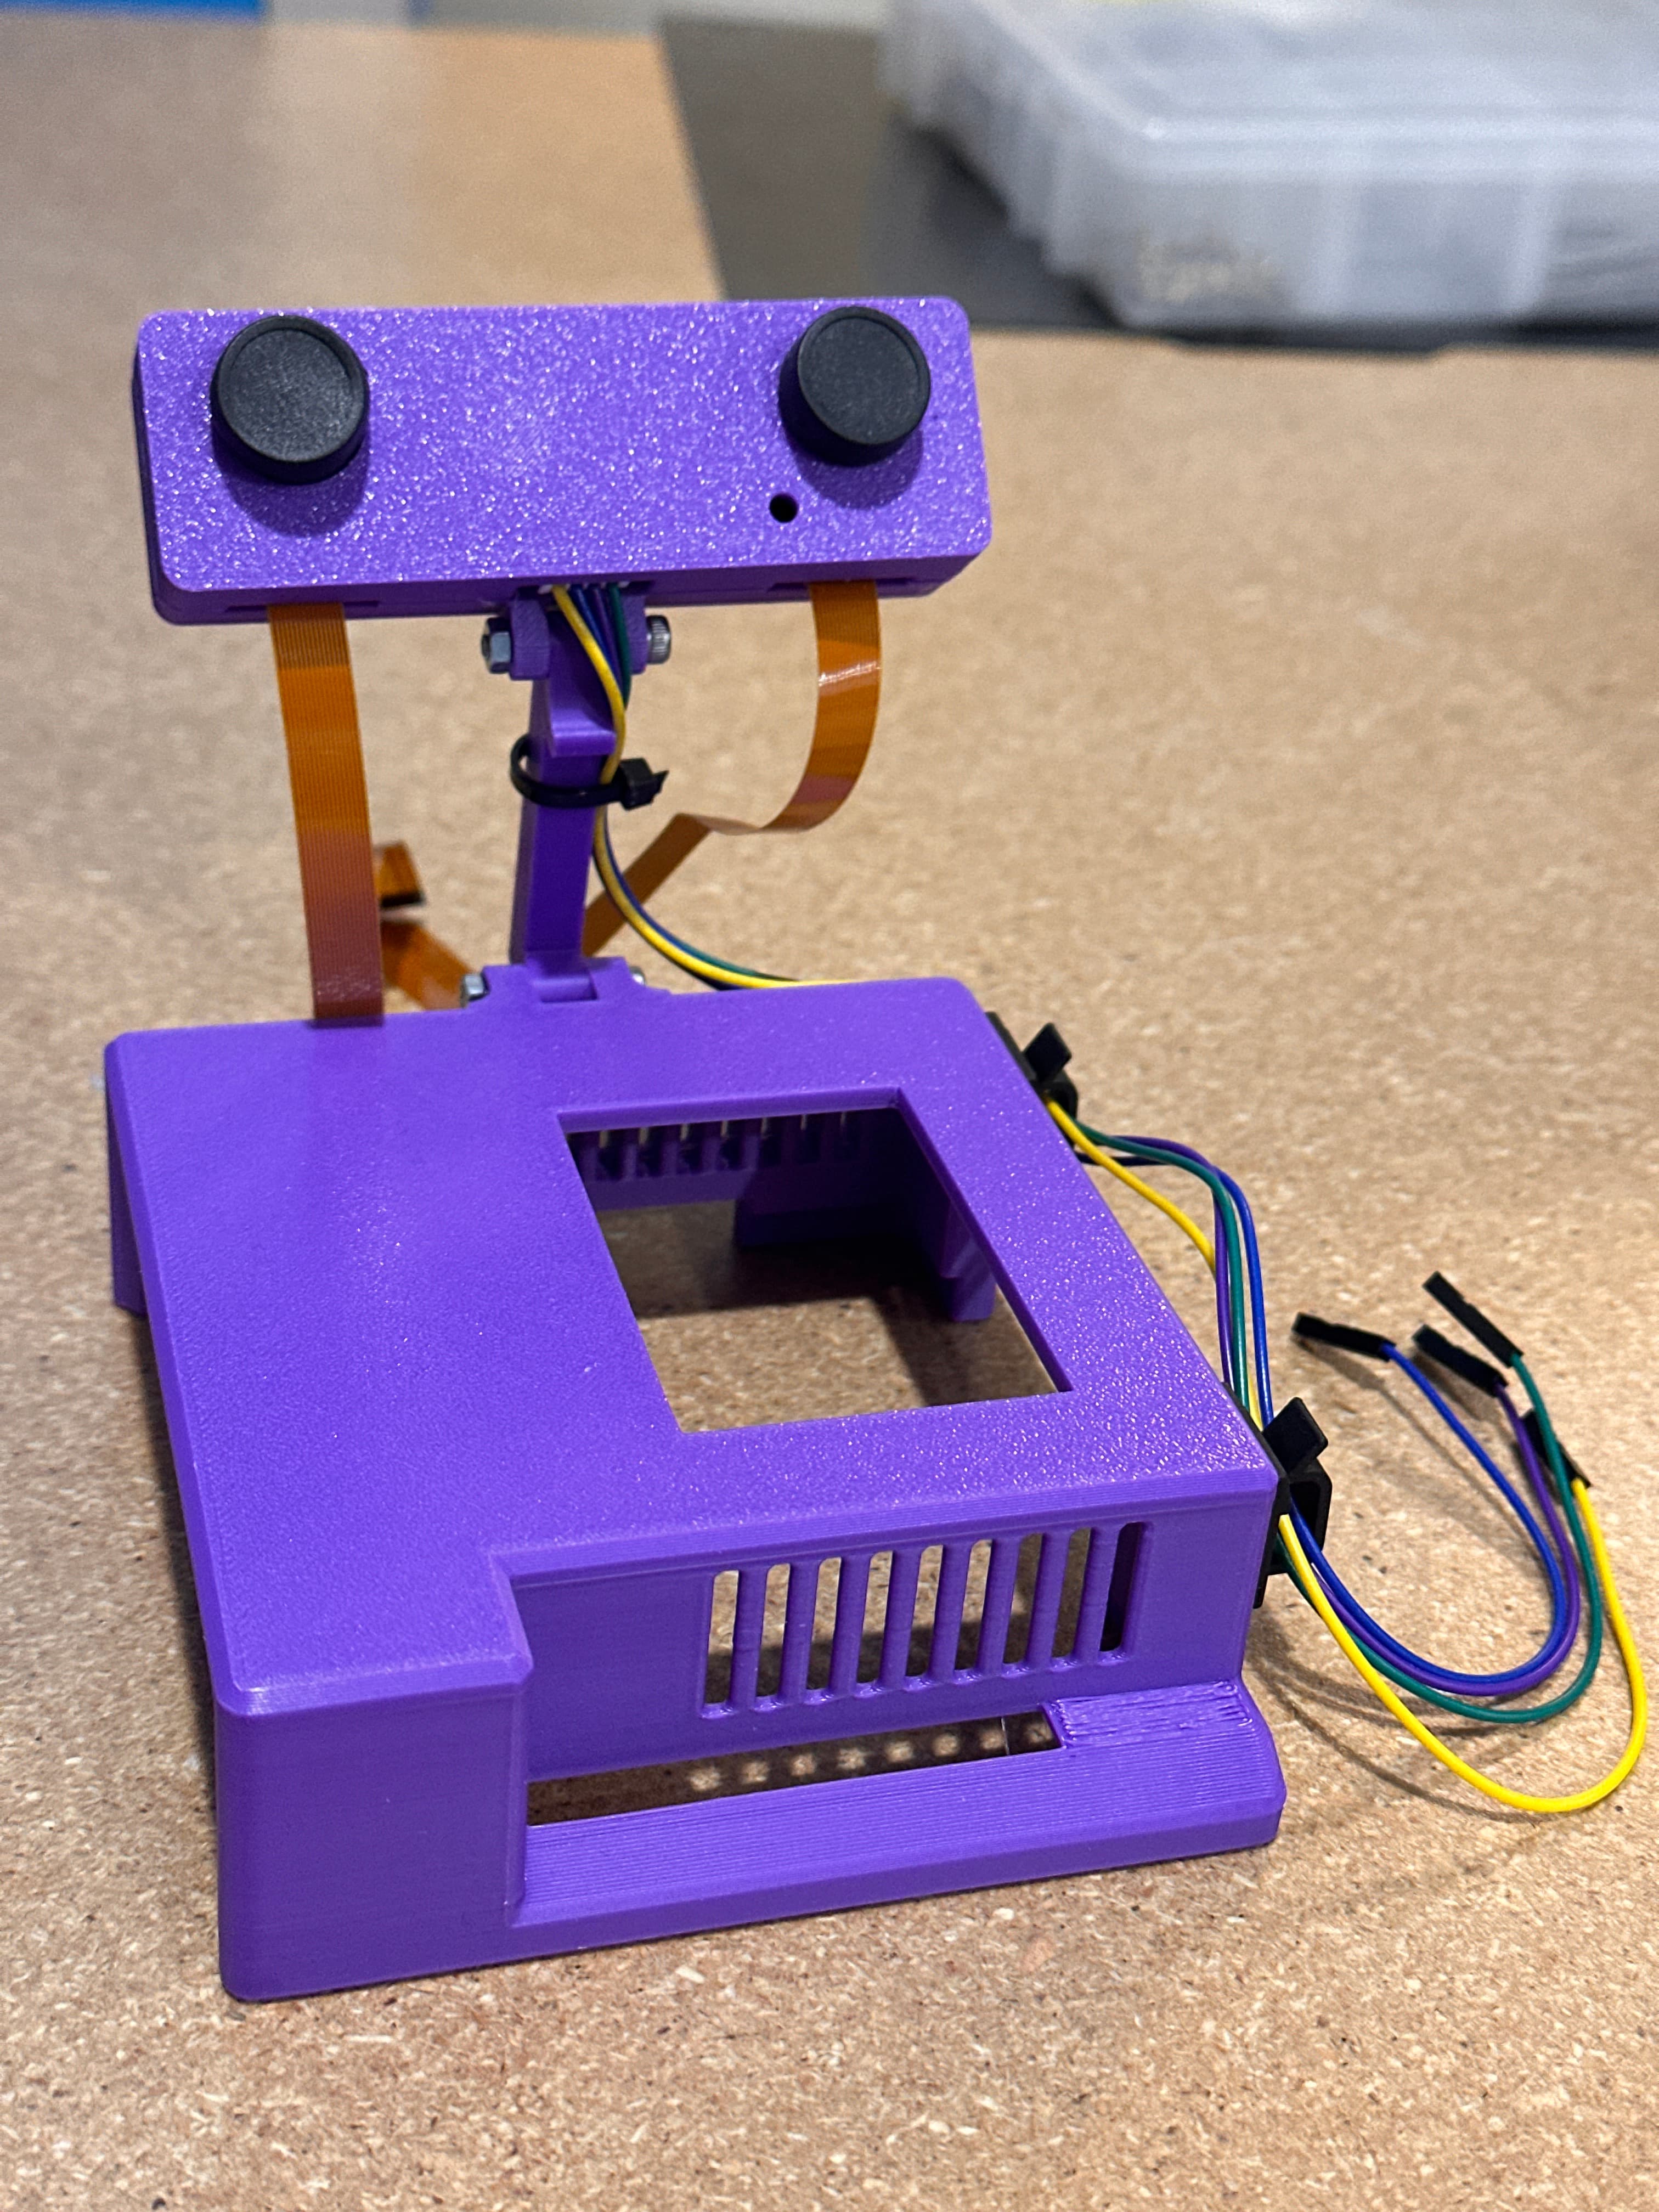
- Case top and bottom — Custom 3D-printed field enclosure (two halves)
- IMX219 Studio camera — Dual stereo cameras pre-mounted on the adjustable camera bar
- NVMe SSD 256GB — Preloaded with the Jetson Orin Nano Field Kit system image
- AC600 TP-Link USB WiFi adapter — Dedicated chipset for stable AP/hotspot mode
Included Hardware
This kit transforms the standard developer board into a ruggedized, portable workstation:
- 256GB NVMe SSD (Bootable) — Pre-flashed with the custom Field Kit system image. High-speed storage drastically improves system responsiveness compared to microSD cards.
- Dual IMX219 Stereo Cameras — 8MP Sony sensors pre-mounted and calibrated for depth sensing and stereo vision.
- USB WiFi Adapter — Dedicated chipset (
8821cu) for stable AP/hotspot mode. - Custom 3D-Printed Field Case — Protects the electronics and provides rigid, adjustable mounting for the dual IMX219 camera module.
Assembly Steps
Before you start
Lay out all components on a clean, static-safe surface. Keep the Jetson unpowered until Step 5.
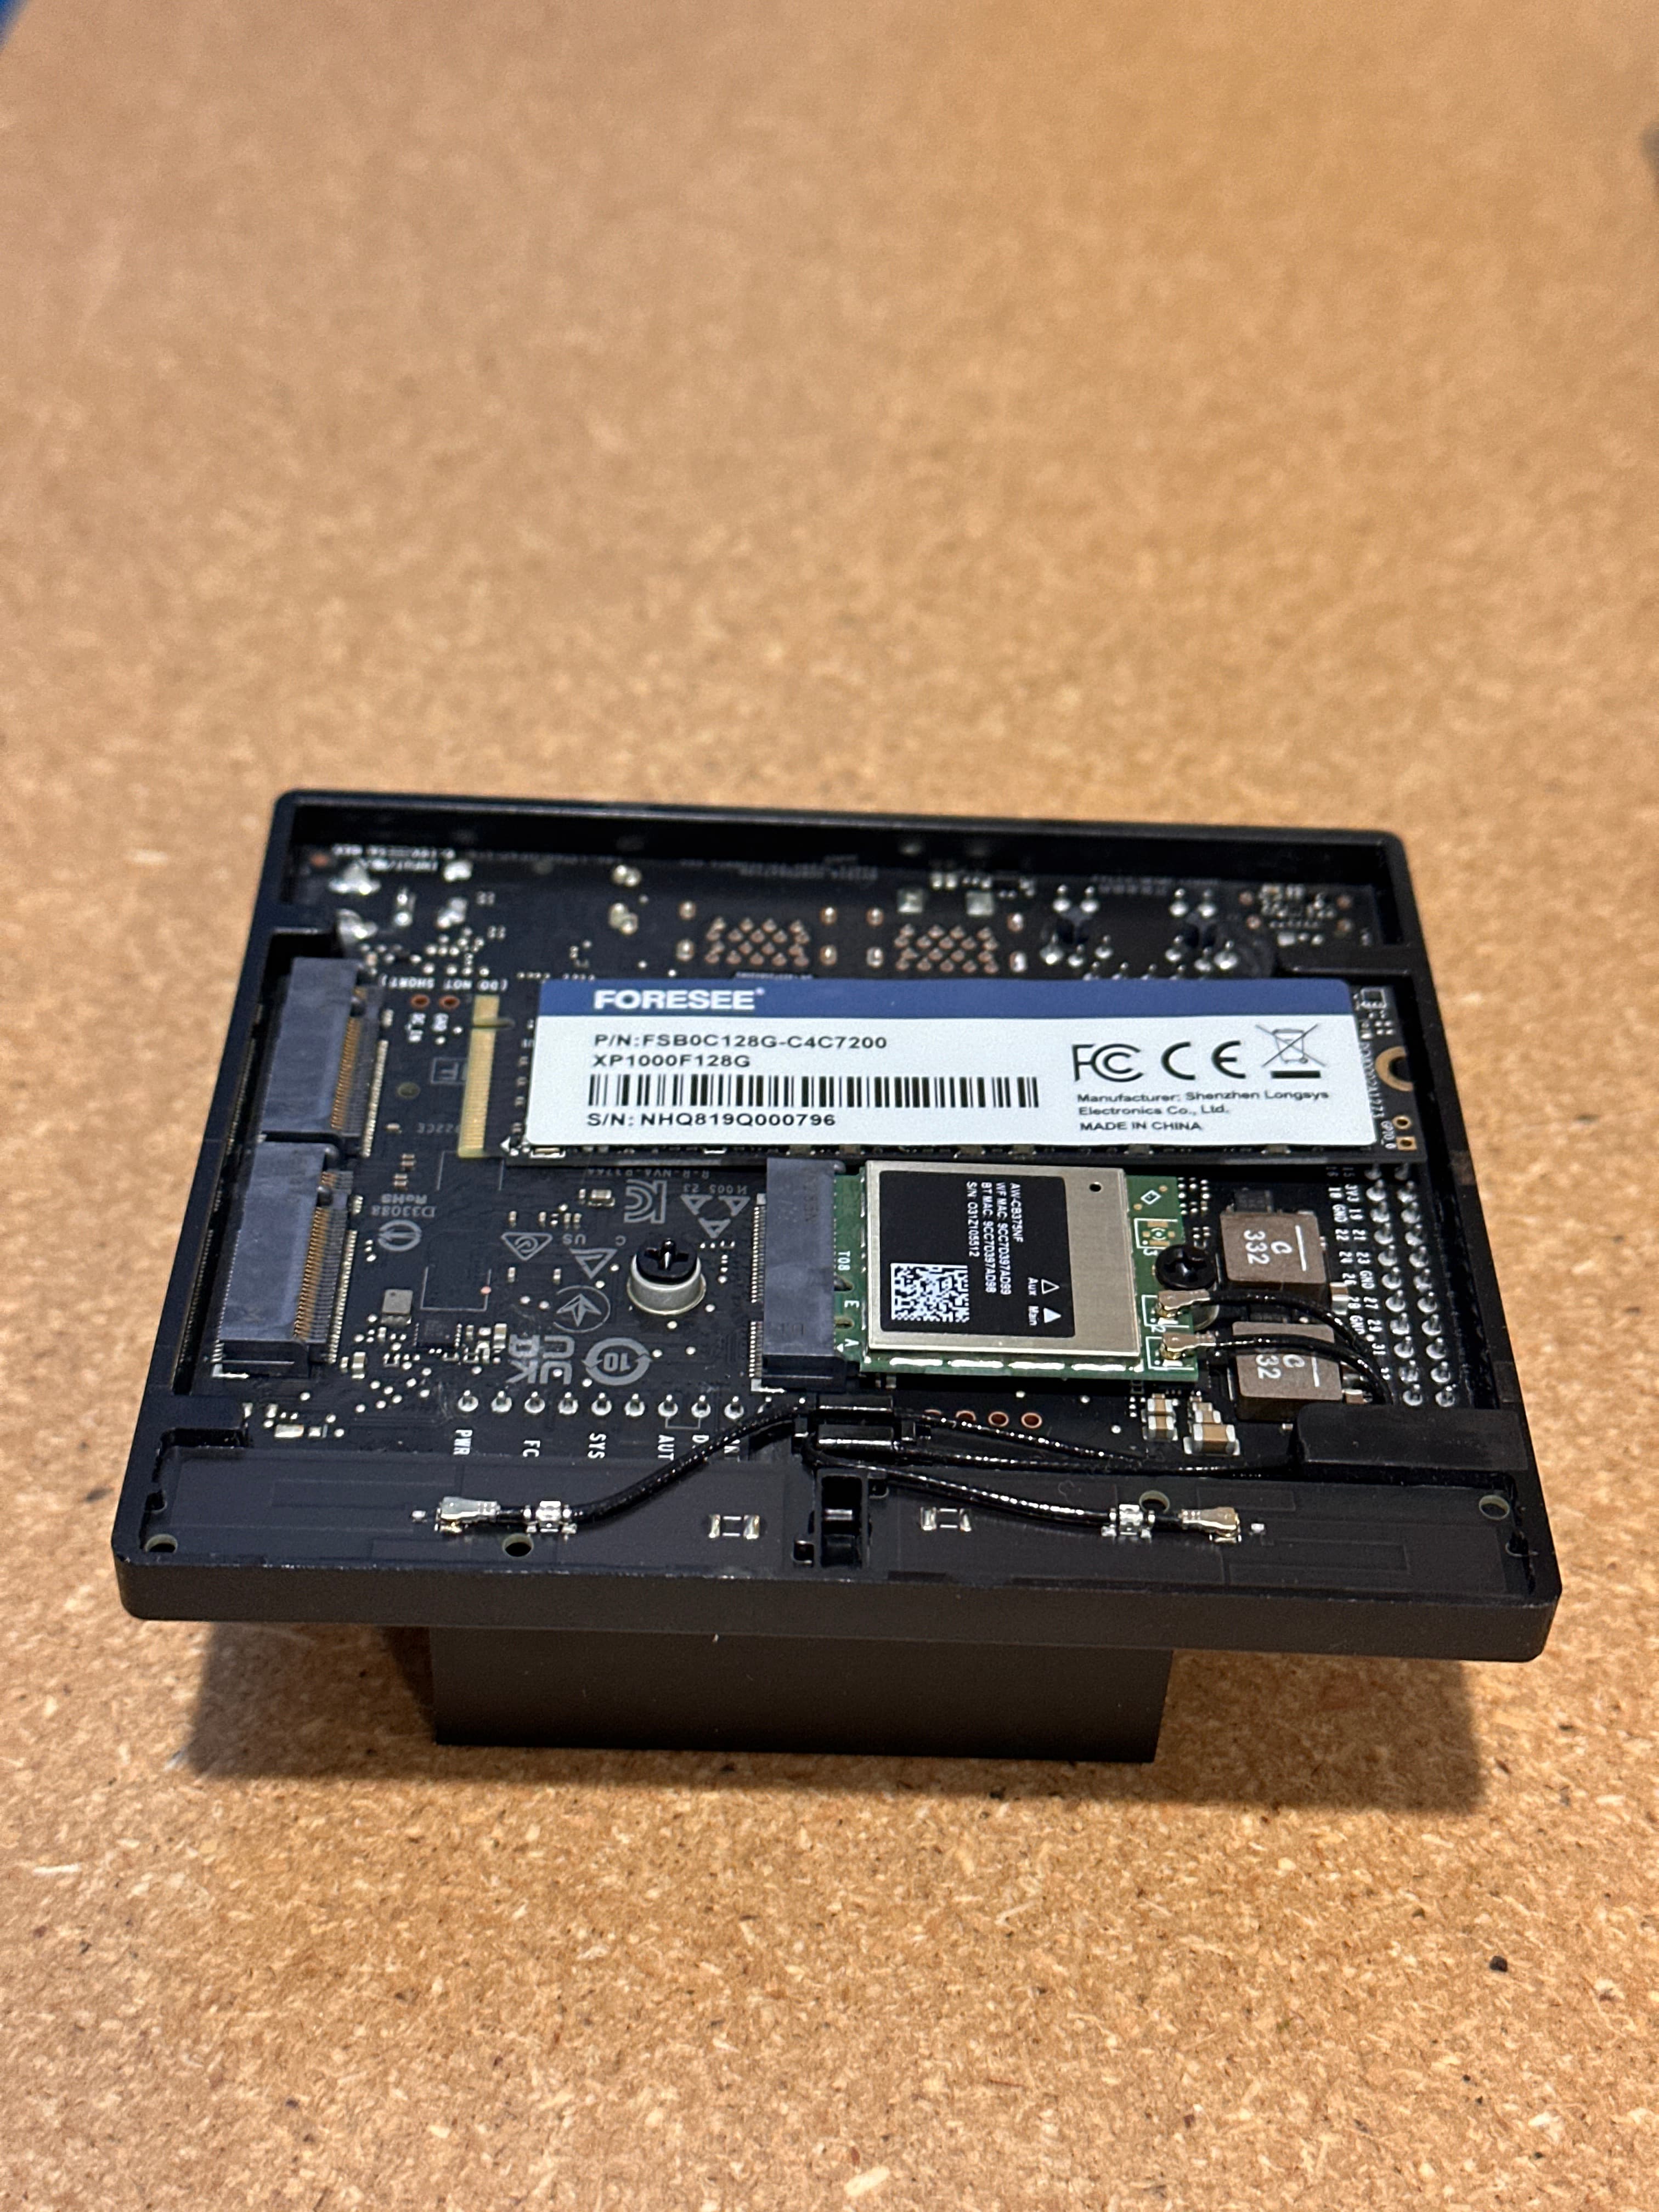
Step 1 — Install the NVMe SSD
Add the NVMe SSD into the underside of the Jetson Orin Nano:
- Power off and unplug the board.
- Flip the Jetson Orin Nano upside down to expose the M.2 slot.
- Insert the NVMe SSD at a shallow angle into the M.2 connector.
- Press the drive flat and secure it with the included mounting screw — snug only, do not overtighten.
Step 2 — Plug in the USB WiFi Adapter
Insert the TP-Link AC600 USB WiFi adapter into a USB port on the Jetson Orin Nano:
- Use any available USB Type-A port on the carrier board.
- Seat the adapter fully — it should sit flush without wobble.
- Leave the adapter connected during case assembly; route the dongle clear of the fan and CSI cables.
The AC600 uses the
8821cuchipset and is pre-configured in the Field Kit image for Access Point mode (JetsonFieldKit).
No photo for this step
Plug the white TP-Link AC600 dongle into any USB Type-A port on the carrier board until it sits flush. The adapter is included in the kit — see the WiFi item in What's in the Box above.
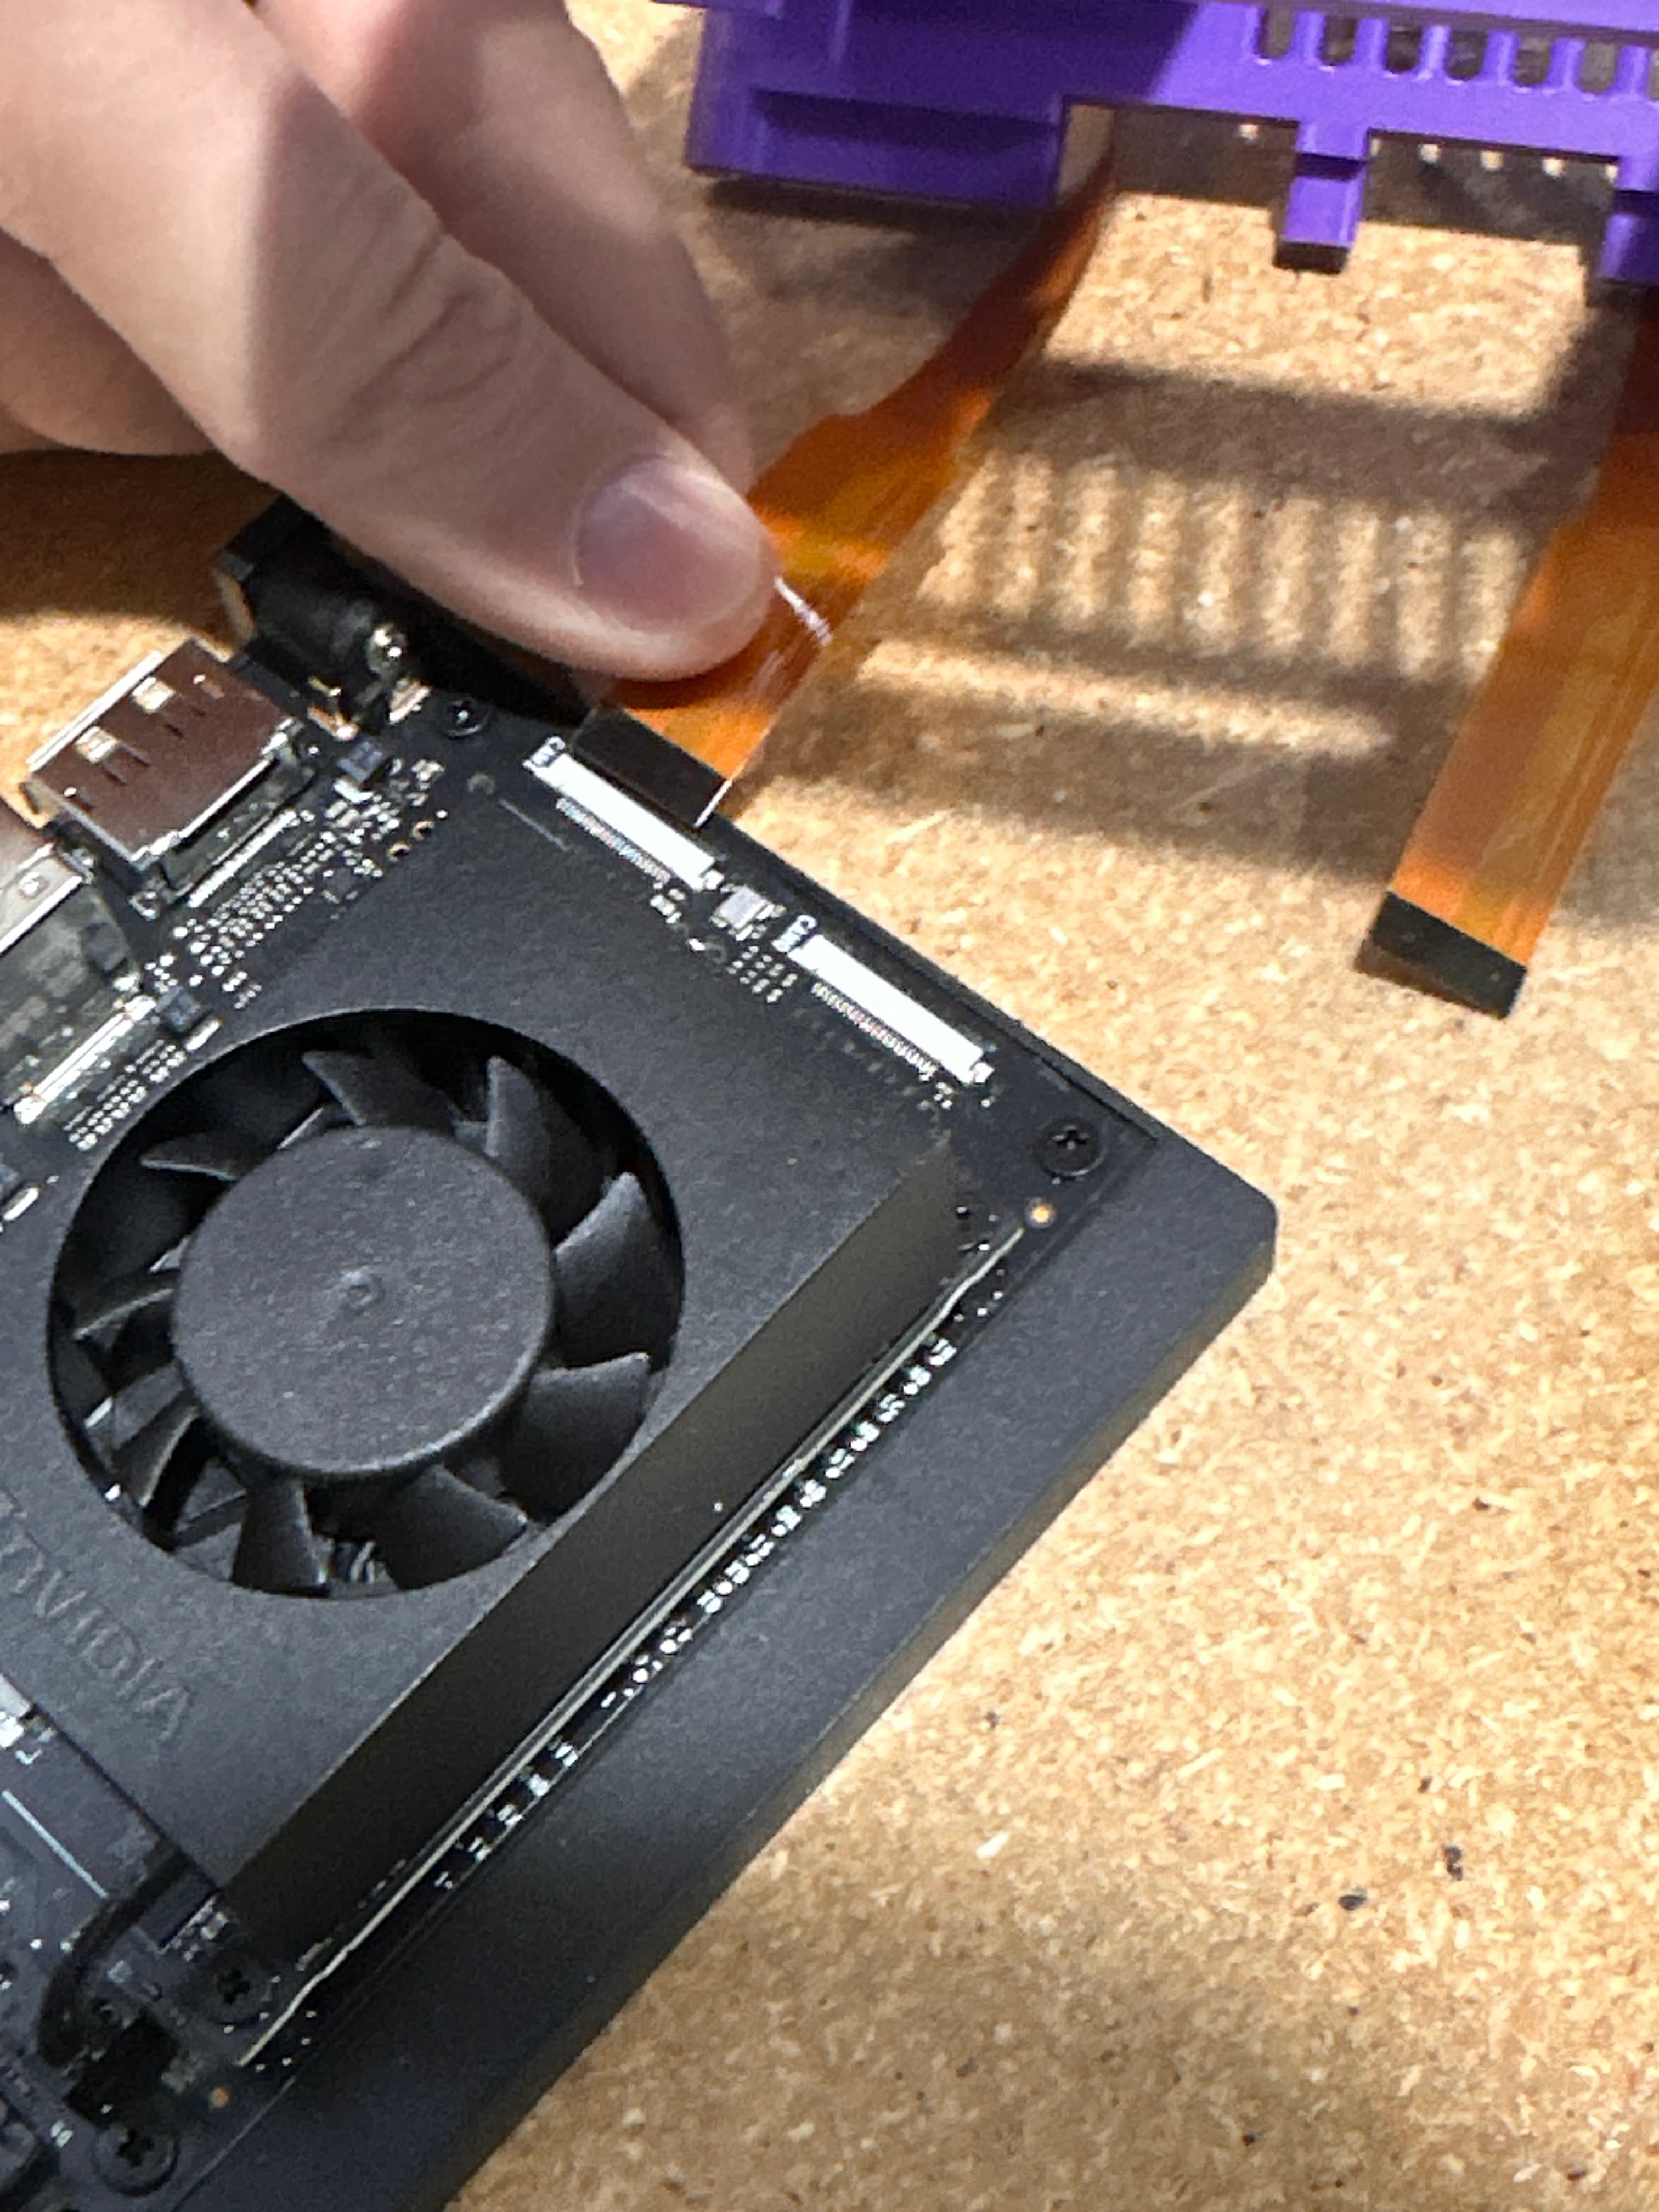
Step 3 — Attach the CSI Cables
Connect the camera ribbon cables to the Jetson Orin Nano — be very careful, connector caps are delicate:
- Locate CAM0 and CAM1 on the carrier board edge.
- Gently lift each black plastic latch to the open position — do not pry past the stop.
- Slide each orange CSI ribbon into the connector with contacts facing the board (contacts inward).
- Press the latch straight down to lock the cable — never force a misaligned ribbon.
CSI latch care
Damaged CSI latches cannot be replaced easily. Open the latch only as far as needed, insert the ribbon squarely, then close with even pressure on both sides.
Step 4 — Mount in the Case
Place the Jetson Orin Nano into the case and attach the bottom cover:
- Route CSI cables through the case cutouts without sharp bends or pinching.
- Lower the Jetson module into the top half of the case, aligning standoffs and port cutouts.
- Attach the bottom case cover to the top cover with the included screws.
- Tighten screws in a cross pattern — finger-tight plus a quarter turn, no more.
Step 5 — Power On and First Boot
Once everything is connected:
- Connect the 19V power supply.
- Press the power button and wait 1–2 minutes for first boot.
- Follow the Zero to Hero first boot guide for WiFi hotspot, SSH access, and verification.
You're ready
Default credentials: username box, password box. Change the password immediately with passwd after first login.
Safety Checklist
| Power off during assembly | Never install NVMe, CSI, or case hardware while powered |
| Do not overtighten screws | NVMe and case screws strip easily — stop at snug |
| CSI latch care | Lift gently, align ribbon, close latch without forcing |
Next Steps
- Zero to Hero with the Field Kit — Networking, SSH, and software verification
- Troubleshooting — Boot, camera, and WiFi issues
- Field Kit Documentation — Full documentation index